Autograder Specifications
Autograders are uploaded to Gradescope in zip format. The file must contain at least two files in the root of the archive:
-
setup.sh: a setup (Bash) script that installs all your dependencies. By default, we're running on Ubuntu images, so you can use apt, or any other available means of setting up packages.
-
run_autograder: an executable script, in any language (with appropriate
#!line), that compiles and runs your autograder suite and produces the output in the correct place.
Note: When you are zipping up your files, make sure to zip the files, and not the folder containing the files. If you zip up the folder then the required files won't be at the root of the zip archive, but rather under a subdirectory, so we won't be able to find them. See the image below for a demonstration of the correct approach on MacOS.

File hierarchy
All autograder related files will be in the /autograder directory. This directory structure is set up when the autograder Docker image is built.
When the autograder executes, the working directory is /autograder.
Files you provide:
- /autograder/source contains the extracted contents of your autograder zip file.
- /autograder/run_autograder is where your autograder script gets copied to during the Docker image build process.
- /autograder/results/results.json is where you put the test output that is uploaded to Gradescope. This must be produced as a result of executing
run_autograder.
Gradescope's autograder harness will create the following files:
- /autograder/submission contains the student's submission, downloaded from Gradescope.
- /autograder/results/stdout captures the output of
run_autograder, for displaying back to the instructor for debugging purposes. Any output you wish to show to students must be explicitly put in the JSON "output" field.
Output format
Your autograder's output should be in the file results.json, in the following format:
{ "score": 44.0, // optional, but required if not on each test case below. Overrides total of tests if specified.
  "execution_time": 136, // optional, seconds
  "output": "Text relevant to the entire submission", // optional
  "output_format": "simple_format", // Optional output format settings, see "Output String Formatting" below
  "test_output_format": "text", // Optional default output format for test case outputs, see "Output String Formatting" below
  "test_name_format": "text", // Optional default output format for test case names, see "Output String Formatting" below
  "visibility": "after_due_date", // Optional visibility setting
  "stdout_visibility": "visible", // Optional stdout visibility setting
  "extra_data": {}, // Optional extra data to be stored
  "tests": // Optional, but required if no top-level score
    [
        {
            "score": 2.0, // optional, but required if not on top level submission
            "max_score": 2.0, // optional
            "status": "passed", // optional, see "Test case status" below
            "name": "Your name here", // optional
            "name_format": "text", // optional formatting for the test case name, see "Output String Formatting" below
            "number": "1.1", // optional (will just be numbered in order of array if no number given)
            "output": "Giant multiline string that will be placed in a <pre> tag and collapsed by default", // optional
            "output_format": "text", // optional formatting for the test case output, see "Output String Formatting" below
            "tags": ["tag1", "tag2", "tag3"], // optional
            "visibility": "visible", // Optional visibility setting
            "extra_data": {} // Optional extra data to be stored
        },
        // and more test cases...
    ],
  "leaderboard": // Optional, will set up leaderboards for these values
    [
      {"name": "Accuracy", "value": .926},
      {"name": "Time", "value": 15.1, "order": "asc"},
      {"name": "Stars", "value": "*****"}
    ]
}
For Java and Python, we have helper libraries that integrate with JUnit and unittest to produce this output format easily.
Note: You should use Unix line endings (aka \n) in your test case outputs to
create new lines.
Controlling Test Case Visibility
You can hide some or all test cases based on your desired conditions. Visibility can be controlled by setting the "visibility" field at the top level for an assignment, or for an individual test.
Note: Instructors will always see all tests, so for now you'll have to create a student account to test visibility settings.
Options for the visibility field are as follows:
hidden: test case will never be shown to studentsafter_due_date: test case will be shown after the assignment's due date has passed. If late submission is allowed, then test will be shown only after the late due date.after_published: test case will be shown only when the assignment is explicitly published from the "Review Grades" pagevisible(default): test case will always be shown
If an assignment level visibility setting is set, a test can override this
setting with its own visibility setting. For example, you may set
"visibility":"after_due_date" at the top level so that all tests are hidden
until after the submission deadline. Then, you can set an individual test to
have "visibility":"visible" if it should always be shown. For example, this
can be useful for pre-submission checks such as a test that checks whether the
student's code compiled successfully or not. Another possibility is having a
subset of tests always visible to guide students through the homework, while
keeping the set of tests that they will be graded on hidden until after the
assignment is due.
If test cases are hidden, students will not be able to see their total score.
Controlling standard output visibility
By default, anything printed to standard output is recorded and only shown to
instructors, for debugging purposes. If you know that nothing sensitive or
revealing is printed to standard output, you can make that content visible to
students by adding a top-level "stdout_visibility" key to your JSON. The value
should be one of hidden, after_due_date, after_published, or visible,
depending on when you want stdout to be visible to students. These options
mirror the test case visibility options described above.
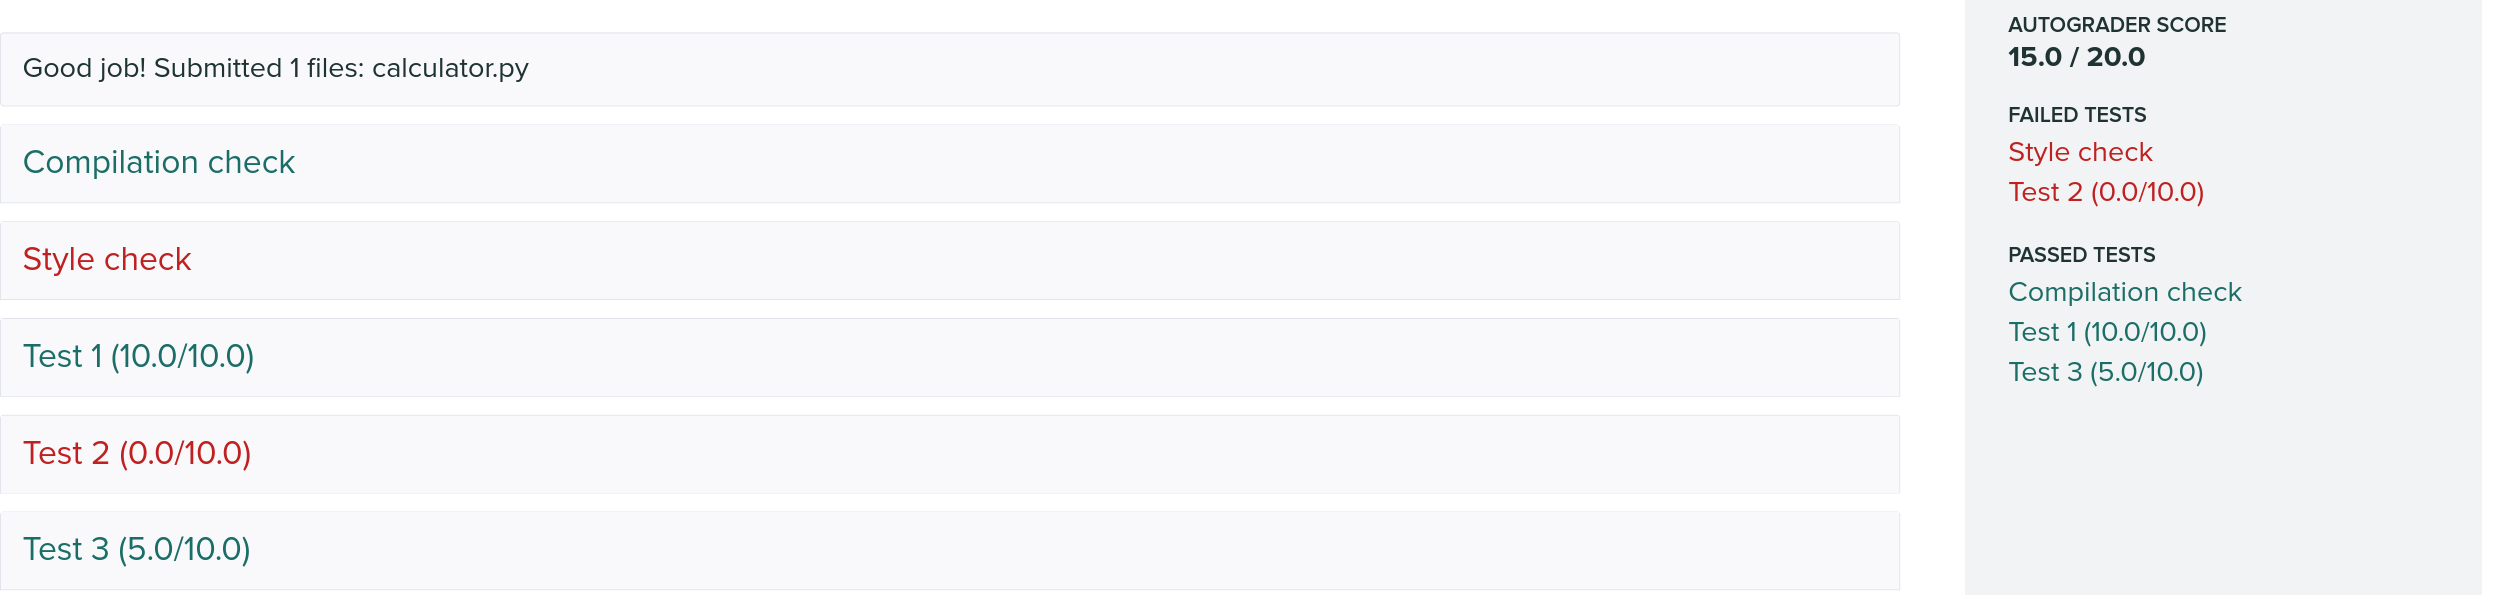
Test case status
The "status" field on a test case can be used to customize the test case's
appearance. By default, test cases where the student was awarded the
"max_score" points are marked as passing, and tests where they achieved a
score lower than the max are considered failing. To override this, you can set
the "status" field to either "passed" or "failed" to mark the test as
passing or failing respectively. You can omit score information to add test
cases that serve as informational checks with a passing or failing status. See
an example below:
{
  "tests": [
    {
      "name": "Compilation check",
      "status": "passed"
    },
    {
      "name": "Style check",
      "status": "failed"
    },
    {
      "name": "Test 3",
      "score": 5,
      "max_score": 10,
      "status": "passed"
    }
  ]
}
Output String Formatting
You can add rich formatting to your autograder output to further customize your autograder experience for students.
Options for the the format field are as follows:
"text"(default for test output and names) - This will do the basic text formatting which was previously done on all test names and outputs. No HTML, Markdown, or ANSI will be rendered."html"- This will render HTML in your output. Note that we sanitize the output so you may not be able to use all HTML elements. Additionally, not all tags will be styled out of the box."simple_format"(default for top-level output) - This is very similar to the"html"format option but will also convert\ninto<br />and\n\n+into a page break."md"- This will render some basic Markdown in your output."ansi"- This will render ANSI colors similar to how the stdout renders them.
Leaderboards
You can add a "leaderboard" section to create leaderboards for your assignment. You can read more about leaderboards here.
Video Walkthrough
If you'd like to watch a video walkthrough of the programming assignment and code autograder setup process, please see our Gradescope for Programming Assignments webinar.